Chair Yoga for Seniors: 10 Seated Poses for Flexibility, Balance, and Calm
Published September 16, 2026
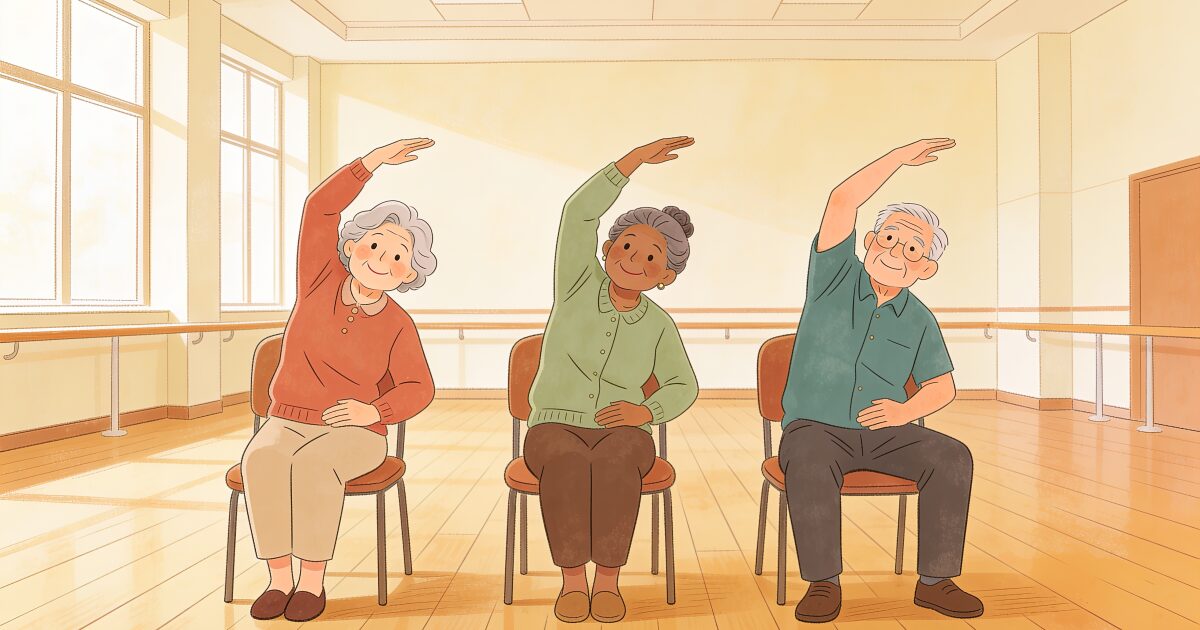
Yoga has a reputation for bendy people on floor mats, and that puts a lot of older adults off before they start. If getting down to the floor is hard, and getting back up again is harder, a mat class is not a welcoming place.
Living alone doesn't mean being unprotected. Simple daily check-ins that save lives.
Try free for 3 daysChair yoga takes the parts of yoga that do the most good, slow stretching, steady breathing and calm attention, and moves them onto a sturdy chair. You keep your feet on the floor and your weight fully supported. Nothing in it requires you to kneel, lie down, or balance on one leg.
This guide explains why chair yoga suits later life so well, what you need to begin, and a 10-pose sequence you can do at home in about fifteen minutes. Each pose has an easier and a harder version, so the routine grows with you.
Why chair yoga suits older adults
- The chair does the balancing. With your weight on the seat and your feet on the floor, you can stretch, twist and reach without any fear of tipping. That frees you to concentrate on the movement itself.
- It is kind to joints. Poses are moved into slowly and held gently. There is no load on the knees or wrists, which makes it a good option for arthritis, hip replacements and stiff backs.
- Breath leads the movement. Every pose is paired with a slow breath in or out. That steady breathing is what leaves people feeling calmer after a session, and it is a skill that carries into stressful moments away from the chair.
- It works for people who cannot get to the floor. If you use a walking aid, have had a hip or knee replaced, or simply do not trust yourself to get up from a mat, chair yoga removes the problem entirely.
- It still builds real flexibility and strength. Seated poses lengthen the spine, open the hips and shoulders, and quietly strengthen the legs and core.
If you already enjoy our chair exercises for seniors, think of chair yoga as the slower, stretchier cousin. Chair exercises build muscle through repetition. Chair yoga builds range of movement and calm through held poses and breath.
What you need
Very little, which is part of the appeal.
- A sturdy, armless chair without wheels. A dining chair is ideal. Arms get in the way of side stretches and twists, though an armchair is fine for the breathing poses if you prefer it.
- Feet flat on the floor. If your feet dangle, put a firm cushion or a folded towel under them. If the seat is so low that your knees sit higher than your hips, add a cushion to the seat instead.
- Comfortable clothes you can move in, with bare feet or non-slip socks.
- A quiet ten to fifteen minutes. Turn the television off.
A short safety note before you start. If you have a heart condition, osteoporosis, glaucoma, a recent operation, or you are unsure about any movement, check with your doctor or physiotherapist first. Stop any pose that causes pain, dizziness or breathlessness, and never force a stretch further than feels comfortable.
A 10-pose seated sequence
Sit towards the front of the seat with your feet flat and about hip-width apart. Work through the poses in order, because each one prepares the body for the next. Breathe slowly through your nose throughout, and take your time.
1. Seated Mountain
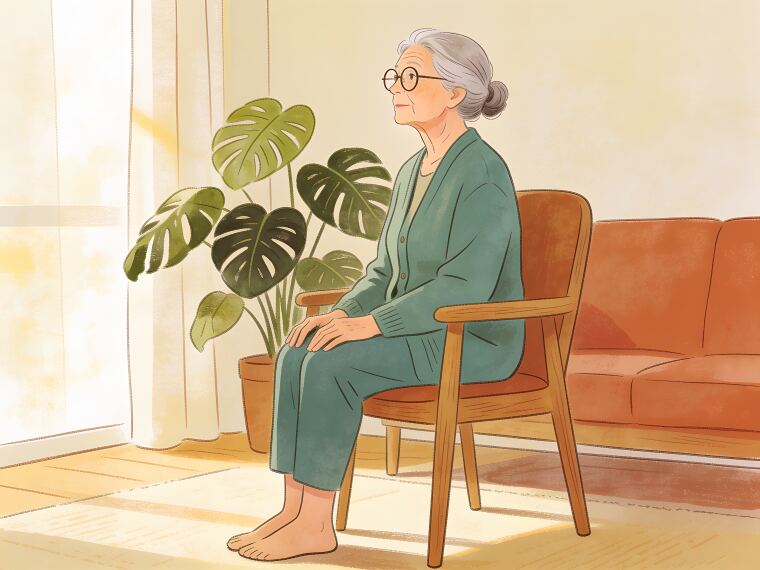
Sit tall with your feet flat and your knees directly over your ankles. Rest your hands on your thighs, palms down. Lengthen up through the crown of your head as if a thread were gently drawing you upward, and let your shoulders soften down away from your ears. Take five slow breaths here, feeling your feet heavy on the floor. This is the pose you return to between every other pose.
Make it easier: rest your back against the chair if sitting unsupported tires you. Make it harder: sit away from the backrest and press your feet lightly into the floor to feel your legs and core switch on.
2. Seated Cat-Cow
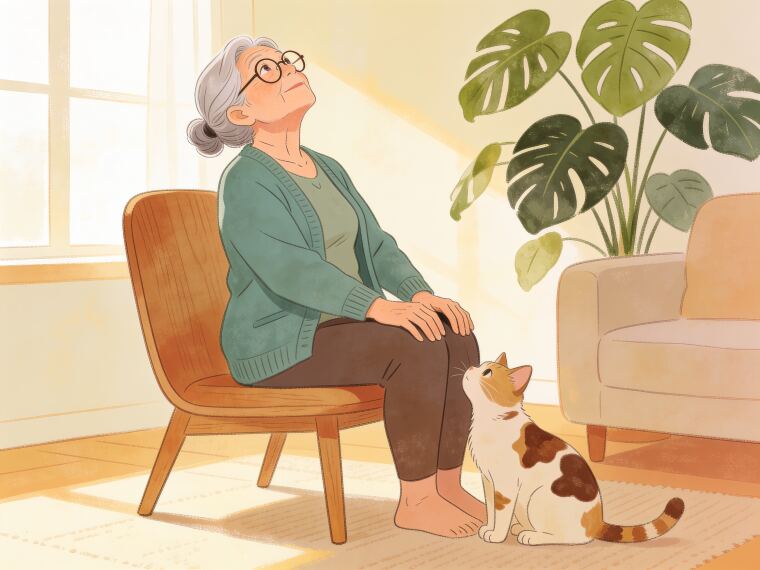
Place your hands on your knees. As you breathe in, draw your chest forward and up, letting your back arch gently and your gaze lift a little (that is the cow). As you breathe out, round your spine, tuck your chin and draw your belly back towards the chair (that is the cat). Move slowly between the two shapes for six to eight breaths. This wakes up the whole spine and eases a stiff lower back.
Make it easier: keep the movement small and your chin level. Make it harder: exaggerate each shape slightly and hold the top and bottom of the movement for a full breath.
3. Seated Side Stretch
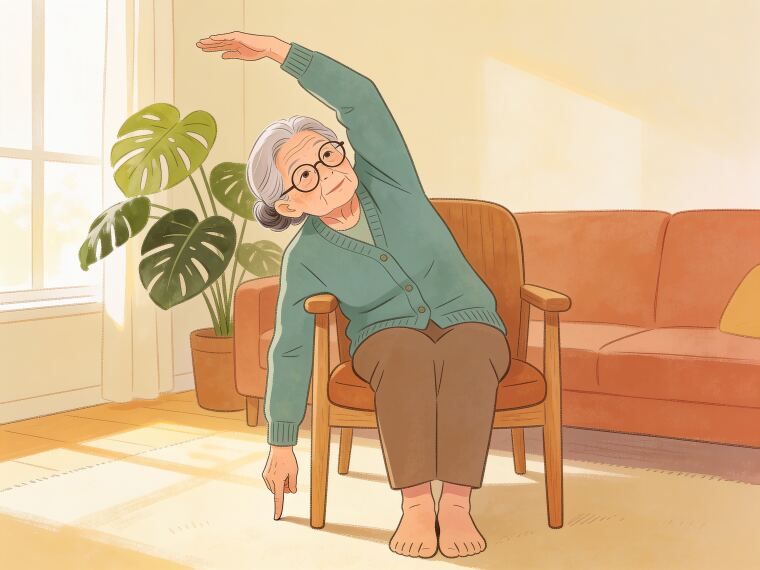
Hold the side of the seat with your left hand. Breathe in and reach your right arm up towards the ceiling. Breathe out and lean gently to the left, keeping both hips heavy on the seat, until you feel a stretch along your right ribs. Hold for three breaths, come back up as you breathe in, and repeat on the other side. Do two rounds each way.
Make it easier: rest the raised hand on top of your head instead of reaching it fully overhead. Make it harder: look up under the raised arm to add a gentle stretch through the neck.
4. Seated Forward Fold
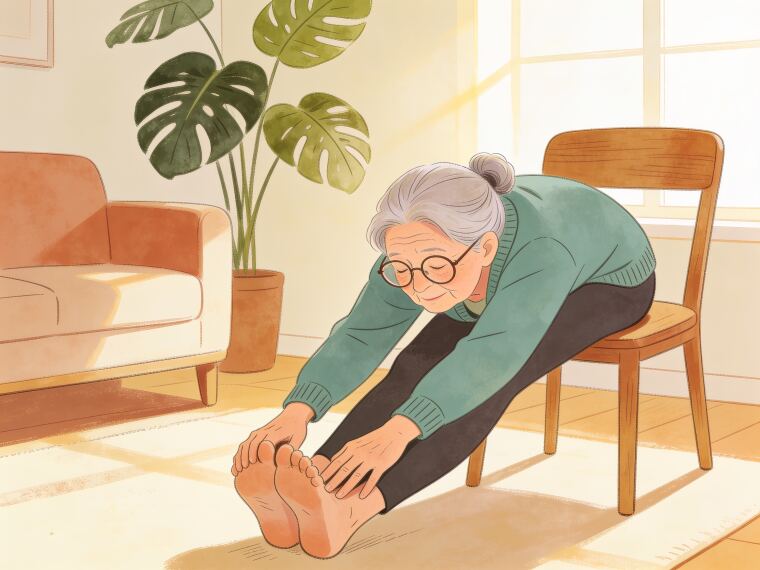
Widen your feet a little. Breathe in and sit tall, then breathe out and fold forward from the hips, sliding your hands down your legs towards your shins or ankles. Let your head and neck hang heavy. Stay for four or five breaths, feeling the back of your body lengthen, then walk your hands slowly back up your thighs to sit tall. Come up slowly, because rising too fast can make anyone light-headed.
Make it easier: rest your forearms on your thighs and fold only halfway. Make it harder: let your hands reach towards the floor and allow your arms to dangle fully.
5. Seated Twist
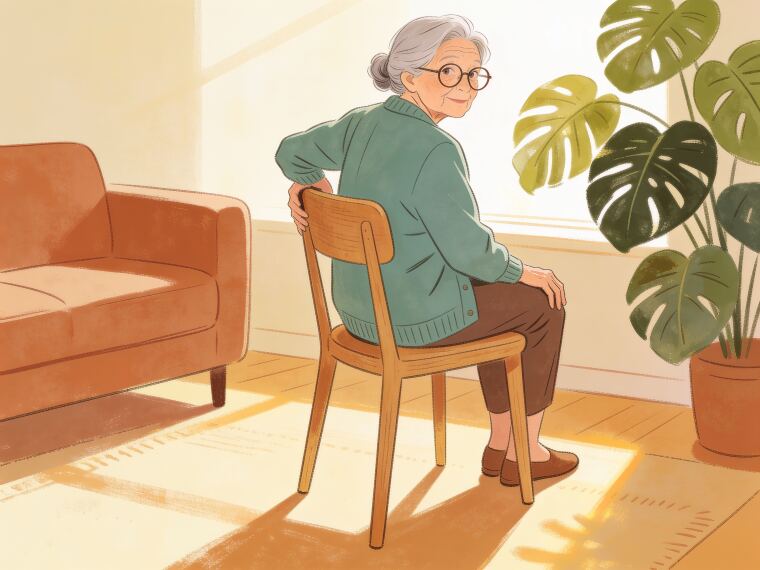
Sit tall with your feet flat. Place your right hand on the outside of your left knee and your left hand on the seat or backrest behind you. Breathe in to lengthen your spine, then breathe out and turn gently to the left, leading with your chest rather than your neck. Hold for three or four breaths, unwind as you breathe in, and repeat to the right.
Make it easier: cross your arms over your chest and turn only as far as feels comfortable. Make it harder: on each breath out, turn a fraction further, keeping your hips still and square to the front.
3-day free trial • Cancel anytime
Daily check-ins that save lives
Join thousands who never worry about being alone
6. Seated Eagle Arms
Stretch both arms out in front of you at shoulder height. Cross your right arm over your left, then bend both elbows so the backs of your hands (or your palms, if they reach) come together in front of your face. Lift the elbows slightly and feel the stretch open up between your shoulder blades. Hold for four breaths, unwind, and repeat with the left arm on top.
Make it easier: simply hug yourself, hands on opposite shoulders, and lift the elbows gently. Make it harder: while holding the pose, tip your chin slightly down and round the upper back a touch to deepen the stretch.
7. Seated Warrior (legs)
Turn to sit sideways on the chair, so your right hip and thigh rest on the seat and your left leg extends out behind you, toes on the floor and the leg gently straight. Keep your right knee bent at a right angle over your ankle. Sit tall, rest your hands on your right thigh, and feel the stretch through the front of your left hip. Hold for four or five breaths, then turn carefully to repeat on the other side.
Make it easier: keep the back leg bent with the knee closer to the chair, and hold the backrest for support. Make it harder: reach both arms overhead and press the back heel gently towards the floor.
8. Ankle Circles and Toe Lifts
Return to Seated Mountain. Lift your right foot a little off the floor and draw slow circles with your toes, five one way and five the other. Place it down and repeat with the left. Then, with both feet flat, lift your toes while keeping your heels down, lower them, and lift your heels while keeping your toes down. Alternate for about thirty seconds. Supple ankles are quietly important for steady walking and for catching yourself if you trip.
Make it easier: keep your heel resting lightly on the floor while you circle. Make it harder: hold the leg out straight in front of you while you circle the ankle, which brings the thigh into the work too.
9. Seated Pigeon (figure-four, optional)
This one opens the outer hips, but skip it if you have had a hip replacement, or if lifting your foot onto your knee feels like a strain. Sit tall and lift your right ankle to rest across your left thigh, just above the knee, so your legs make a figure four. Let the right knee relax down towards the floor. Sit up straight, then fold forward a little from the hips until you feel a stretch in the outer right hip. Hold for four breaths, come up, and repeat on the other side.
Make it easier: instead of lifting the ankle onto your thigh, cross your right ankle over your left ankle and lean forward gently. Make it harder: press the lifted knee gently down with your hand as you fold.
10. Seated Breathing to close
Come back to Seated Mountain and let your eyes close if you like. Rest your hands on your belly or thighs. Breathe in slowly for a count of four, feeling your belly rise, and breathe out for a count of six, letting your shoulders drop. Repeat for eight to ten breaths. Notice how your body feels compared with fifteen minutes ago. When you are ready, open your eyes and stand up slowly, holding the chair.
Make it easier: breathe at whatever count feels natural and simply notice each breath. Make it harder: lengthen the breath out further, or add a short pause at the end of each exhale.
How often should you practise?
Chair yoga is gentle enough to do every day, and daily practice is where stiffness really starts to ease. If that feels like a lot, three or four sessions a week still brings steady gains within a month or so.
On a tired day, shorten the sequence rather than skipping it. Five minutes of Seated Mountain, Cat-Cow and closing breaths keeps the habit alive.
As the poses get easier, you can pair them with other gentle movement. Balance exercises for seniors and tai chi add standing steadiness. If you find you enjoy yoga and want more, our guides to gentle yoga for seniors and yoga for seniors cover standing and floor-based options for when you feel ready.
Finding free chair yoga classes
You do not have to pay for a studio to learn chair yoga well.
- Public libraries. Many run free or very low-cost seated movement sessions, often weekly, and they are a gentle place to meet people.
- Senior centres and community centres. Chair yoga is one of the most common classes on their timetables. Ask at the front desk or check the noticeboard.
- Community and health programmes. Local councils, health services, charities for older people, and some health plans run free movement programmes for older adults. Your doctor's surgery often knows what is available nearby.
- Video classes at home. There are thousands of free chair yoga videos online. Search for "chair yoga for seniors" and look for a teacher who moves slowly, explains each pose, and offers options rather than pushing.
A class with a teacher in the room is the best way to learn the poses correctly. Once you know them, a home routine keeps you going between sessions.
Calm on the chair, and covered for the rest of the day
Chair yoga is one of the safest ways to keep your body supple and your mind calm, and the chair means the risk of a fall during practice is very low. But the practice ends, you stand up, and the rest of the day carries the ordinary risks of living alone: a slip in the bathroom, a dizzy spell, a fall on the stairs, with nobody there to notice.
A daily check-in fills that gap. Each day you get a simple prompt, by app, text message, or a short automated phone call, and you confirm you are okay with a tap or a reply. If you do not respond, the people you have chosen are alerted so someone can look in on you.
See how a daily check-in works and let the calm of your practice carry through the rest of the day.
Get the free Living Alone Safety Checklist
The home setup, daily habits, and emergency info that keep people living alone safe, in one email you can act on this week.
Please complete the verification above.
Check your inbox
Your safety checklist is on the way to .
Frequently asked questions
TRUSTED BY THOUSANDS OF FAMILIES
Never Wonder "Are They Okay?" Again
Daily check-ins with automatic alerts to your loved ones if you ever need help.
"I was skeptical at first, but after my neighbor was found 3 days after a fall, I signed up immediately. Now my daughter knows I'm okay every single day."
— Margaret R., 72, living independently
Related Articles
Gentle Yoga for Seniors: 8 Beginner Poses for Strength and Calm
Yoga at any age improves flexibility, balance, and peace of mind. These 8 gentle poses are designed...
Vitamin B12 for Seniors: Why It Matters and How to Get Enough
B12 keeps your nerves, blood, and memory working well, yet older adults often absorb it poorly. Here...
Tai Chi for Seniors: A Gentle Way to Build Balance and Calm
Slow, flowing, and easy on the joints, tai chi is one of the best exercises for older adults. Here's...
Yoga for Seniors: Benefits, Best Styles, and How to Start
Yoga is one of the kindest ways for older adults to build flexibility, balance, and calm. Here's wha...